We have a YouTube Channel Named George Loves Weather. 
It may be examined for video content at https://www.georgelovesweather.com/YouTube
You may Subscribe to our channel there. There are other videos to view.
Here is our most viewed video.
Have a Better Life By Using Weather Instruments
I have gone into great detail for you, so you will understand all the areas of weather station mounting.
I hope you enjoy and learn much about this subject in my series of posts that talk about weather station mounting.
We have a YouTube Channel Named George Loves Weather. 
It may be examined for video content at https://www.georgelovesweather.com/YouTube
You may Subscribe to our channel there. There are other videos to view.
Here is our most viewed video.
In this article, I will give you Ambient weather station mounting ideas.
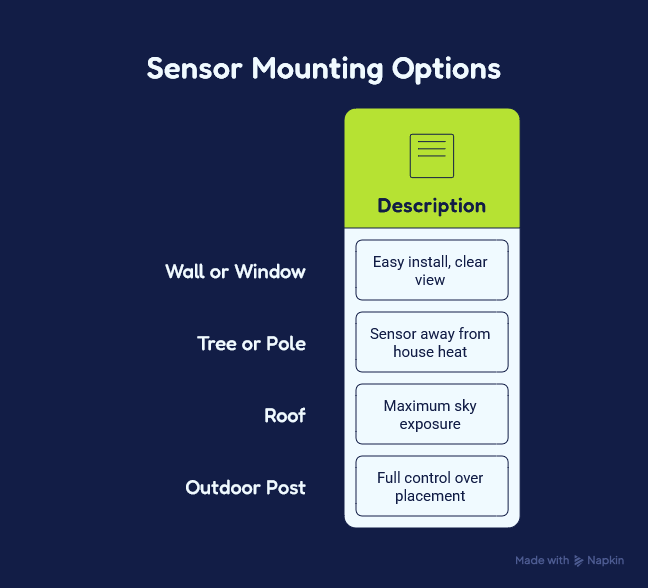
To begin with, you need to pick the right place to mount your Ambient weather station. The best places are usually trees or poles.
You can also mount it on a wall or a fence between properties if there is enough space on the top or the side to do the installation.
If you are looking for some Ambient Weather Station mounting ideas, here are a few things you should keep in mind:
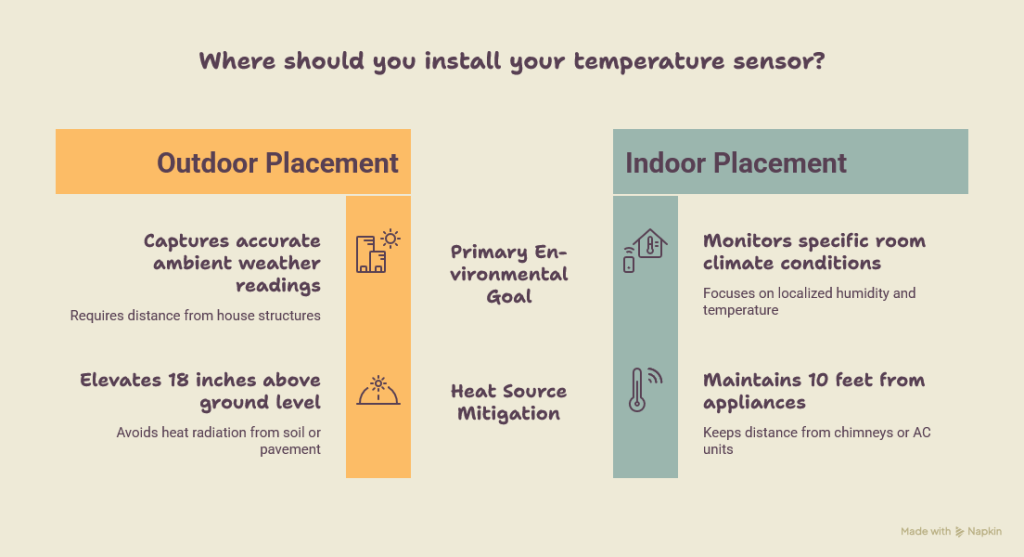
Weather stations should be mounted on a wall that is at least 10 feet away from any heat sources.
Keep your weather station out of direct sunlight and away from windows.
Mount your weather station at least 18 inches above the ground.
Mounting an Ambient Weather Station is not that difficult.
You just need to place it in a location where it can get a good view of the sky and be away from any obstructions.
An Ambient Weather Station is a device that measures, records, and transmits various environmental conditions.
An Ambient Weather Station has a sensor that detects the temperature and humidity in the air, wind speed, wind direction, rainfall, and snowfall.
It also detects atmospheric pressure, dew point, and barometric pressure.
The sensor then transmits this information to a display unit which can be mounted on a wall or pole for easy viewing.
The mounting location of your weather station should depend on what you want to monitor.
If you want to measure indoor temperature and humidity then it would be best to mount it indoors in close proximity to the area you want to monitor.
You could also mount it outdoors if you want an accurate reading of outdoor temperature and humidity
If you are looking for some ambient weather station mounting ideas, here are some of the best places to mount your Ambient Weather Station.
Try out one of these 4 mountings on your Ambient weather station.

Ambient Weather Station Mounting Ideas
There are a few things to consider when mounting your Ambient Weather station.
First, you’ll want to make sure that the unit is mounted in an area where it will be able to get an accurate reading of the Ambient temperature.
This means that it should be mounted in a spot that is not in direct sunlight and is not near any heat sources.
Additionally, you’ll want to make sure that the unit is mounted at a level where it will not be obstructed by any objects.
Once you’ve found the perfect spot for your Ambient Weather station, you can then decide on the best way to mount it.
There is a variety of Ambient Weather station mounts available, so you’ll want to choose one that best suits your needs.
Ambient Weather EZ-29-24 Chimney Mounting Kit with Mast
Ambient Weather WeatherMount Weather Station Mount
Ambient Weather EZ2-35W2MC Weather Station Pole Mounting Kit
Whether you opt for a traditional mount, or something more unique, make sure that your Ambient Weather Station is mounted securely so that you can always get accurate readings.
Once you’ve found the perfect spot, you’ll want to use mounting brackets or velcro strips to secure the station in place.
With a little trial and error, you should be able to find the perfect spot for your Ambient weather station.
Ambient weather stations are designed to be mounted on a variety of surfaces.
The most popular surface for mounting is the wall.
Wall-mounted Ambient weather stations provide an unobstructed view of the display, making them easy to read.
Ambient weather stations can also be mounted on poles or tripods.
Pole-mounted Ambient weather stations are often used in public areas, such as parks and playgrounds, where they can be easily seen by passersby.
Tripod-mounted Ambient weather stations are commonly used in classrooms and science labs, where they can be placed at eye level for easy viewing.
When choosing a location for your Ambient weather station, make sure that it is in a secure and accessible spot.
I really don’t see any reason you would need to hire someone unless you can afford it, or if you just really are not handy enough to set up the right brackets, clamps, pole, and have the right tools to get the job done.

Ambient DYI Weather Station Mounting
In fact not only can you check out my DYI ideas but, you can learn more about the Ambient product line by going to Ambient Weather at Ambient Weather Best Performing Weather Stations
I have written Ambient Weather Station reviews previously as well.
You may reference these to get yourself better informed on my views of Ambient weather stations.
Ambient Weather Weather Station-Complete Review of the WS-1002 Observer
Ambient Weather WS-1201-IP Observer-We Take a Close Look
Ambient Weather WS-2902 Pro Weather Station Reviewed
Ambient WS-2902 Pro Weather Station
One thing that will always be a concern if you are on a budget, and honestly who isn’t these days, you are probably concerned about getting the correct information and lining up your ducks on what the cost of mounting will end up being.
So you see the mounting I believe can probably be completed for around $75.00 as a DIY project.
Maybe quite a bit under, as well.
However, if you do go to the weather station pole mounting kits, you will notice many of them are for sale at between $55-$75 as well.
But some of the kits like a tripod kit can run you as much as $199.99.
Ambient Weather EZ-48 Weather Station Tripod and Mast Assembly
Ambient Weather EZ-NPP Tripod and Mast Assembly with Platform
My conclusions are that mounting is a very important step for you.
Protect your investment by getting your weather station properly mounted as well as soundly mounted.
Strong winds, severe heat, and severe cold are a prominent part of our weather not sometimes, but usually.
Remember weather is a very powerful thing.
Day in, day out, and ordinarily it is very basic, but once in a while, it rears up its power and forcefulness.
Be aware, and work with your weather to have a much better life.
Monitor your weather, track it, record it, and become familiar with it.
Befriend it it can be a great friend once you get to know it.
That is why I love weather stations. I watch and learn from my weather being monitored.
I hope this conversation helped you out with getting some good Ambient weather station mounting ideas.
Please feel free to contact me at support@georgelovesweather.com
If I were to start telling you about mounting AcuRite weather station, you would say that there is a lot more to it than you thought there would be.
I intend this article to give you a clear picture of what you will need to do to mount your AcuRite weather station.
It is your property, so the best thing is that you can choose where you wish for it to be installed.
The only thing is that you will need to make sure that you will be able to receive the instrument’s transmission to your display.
If the transmission is good then have a go at installing your AcuRite weather station.
Installing a weather station can be that easy, but you may also want to include a few other things to think about before deciding where your station goes on your property.
You may get your copy of my Free Report, Site Placement-Install Your Weather Station
This report will shed much more light on how, where, and why you would want to install or mount your personal AcuRite weather station.

With Mounting an AcuRite Weather Station you will experience making a few decisions.
In my report, Site Placement-Install Your Weather Station, many, many diverse reasons that will affect where you actually would be best served to place your weather station.
So I suggest heavily considering using the report as a guide, not a dictum.
You will get better results from your weather instruments if you do. Be happy that you did, instead of sorry later that you didn’t.
So in detail let’s now discuss the actual mounting of the AcuRite Iris 5-In-1 weather station.
As you know from my previous post, AcuRite Iris 5-In-1 Weather Station Review-What’s It Like, I go over why I picked out this AcuRite weather station, as my gift to my son and his family.
So the rest of this post details the actual mounting, my son and I did the other evening on his property.
Here are a few steps you should perform in this process.

Here are the actual steps I completed as I completed mounting the AcuRite weather station in his yard.
I had purchased ahead of time the mounting pieces that we were going to use for installing the AcuRite Iris 5-In-1 sensor array.
I have listed the first items as they are what I used to mount my AcuRite Iris 5-In-1 weather station. As you can see in this video.
Here is the video with the details of my purchases.
I did research on my Amazon sales for the past year. All of the weather station mounting poles, brackets, etc have been purchased by users of George Loves Weather.
I feel this can save you time researching, and that it can also give you actual suggestions that could prove answers for you.
Thus here is my list of actual mounting poles, brackets, etc that have been used to mount their very own weather stations.
List Of Customer Purchases Ideas You Can Use For Mounting Your Weather Station
So I hope you will use this list to save time.


Steps 3-5 From My Actual Mounting Of the AcuRite Iris
We left off with two steps discussed earlier. Now onto the rest of the steps.

You must prepare to set the Iris sensor array onto the top of the pole.
That is why I made sure the top of the pole was bought with a Swedged End.
This will allow for the sensor array to fit nicely over the top of the pole. Then you may insert a couple of screws through the sensor array into the swedged end of the pipe to secure the array firmly in place.
I do mention using the bubble level on the top of the array as a guide to level up your instruments.
This will ensure that the rain gauge is level for collecting the rain.
Before you secure the sensor on top of the pole very important to make sure the transmission switch is set to “Switch A” Button.
I will be setting the display inside on “Switch A” Button as well.
This is on Page 6 of the AcuRite 5-In-1 Weather Sensor instruction manual for the rain gauge calibration
There are directions in the sensor manual where you can set up the calibrations for your rain gauge

So now after everything is secured, I need to go inside the house to the Iris display, to make sure the display transmission switch (inside by the batteries) is set to the “Switch A” button as well.
After I did this within a few minutes (give it at least 15 minutes to talk to the sensor) we had results.
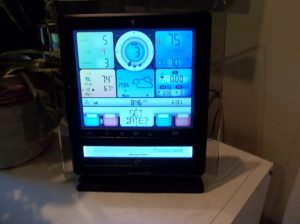
Weather instrument readings were showing up everywhere on the display.
The display has now populated with weather instrument data from all of your weather sensors in your yard.
Now your display is working.
Remember, the forecaster will start forecasting within a few hours.
Remember as well that it will take at least 15 days for the forecaster to hone in on your weather, so that it can give you accurate forecasts all the time, from here on out.
See the AcuRite Mounting Highlights on this video footage.
Please comment on these posts as well as please write me with any questions you may have concerning mounting your weather station.
You may write me at support@georgelovesweather.com
In light of the fact that it is one of the hardest parts of mounting a personal weather station, I thought I would help you out. Give you a leg-up if you will.
As I thought about creating this post, I said to myself, what would really help a beginner with weather stations.
As I have moved forward with my website, George Loves Weather, several things have stuck out to me.
Mounting a weather station is key to getting there most from your weather instruments
Where you place your weather station instruments or your sensor array is very important.
Good results come from having a good location where you installed your instruments
Keeping all of these things in mind, I realized in looking at actual sales I have made to real users of my site, that their decisions often came from research and hard work.
What they ended up buying to mount their weather station is important to them
Thus here is my list of actual mounting poles, brackets, etc that have been used to mount their very own weather stations.

Wireless Weather Station AcuRite
I have listed the first items as they are what I used to mount my AcuRite Iris 5-In-1 weather station.
The Channel Master and the steel pole for Solare are the two items you will notice in my video.
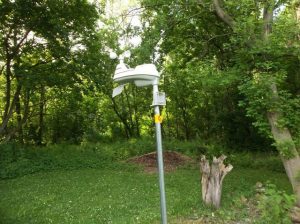
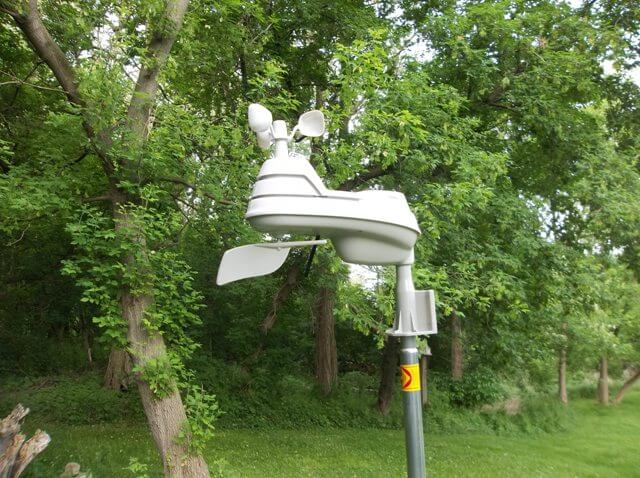
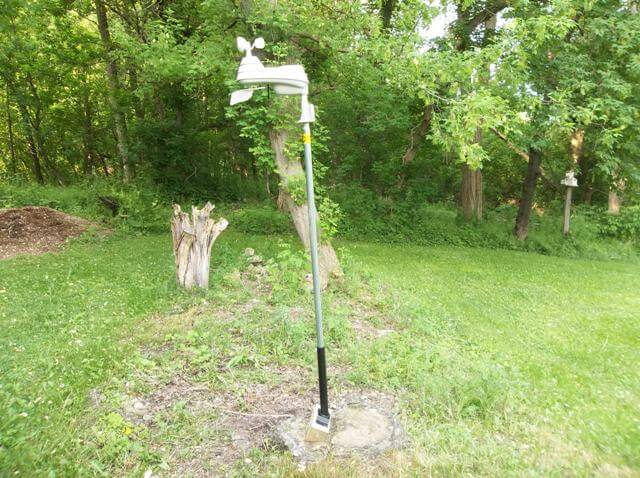
Here is the finished mounting of the AcuRite Iris.
We had to modify the block of wood that the steel pole bracket holder was attached to.
Everything is working just fine at my son's home.

AcuRite Mounting Pole Ideas

Steel Pole Mounting Bracket
I have created a video on my George Loves Weather You Tube Channel.
You may watch this to see how and what I actually did to mount this weather station for my son.
It was a gift from me to him. It was also a father-son project which admittedly I thoroughly enjoyed as as well.
Please watch and see if it helps you out.
You may also want to receive my Placement Pdf as a guide and help.
[fuzzy_optin video=”1″]
As you can see this is quite the impressive list.
Many of these will work for your current mounting needs.
Skywalker 4” Heavy-Duty Wall Mount Pair for TV Antenna Mast with (2) Brackets & Lag Bolts
Ambient Weather EZ-48 Weather Station Tripod and Mast Assembly
Starlink Gen 3 Mount, Height Adjustable Starlink Mounting Kit, Compatible with Gen 3 Starlink , Starlink Gen 3 Mount for Wall & Roof Mounting
Proxicast Pro-Grade J-Max 100% Solid Stainless Steel Antenna Mount – Universal Outdoor Adjustable Pivot/Lock Bracket & J-Pipe Mast
Newpowa Universal Solar Panel Double Arm with Support Pole and Wall Mount Bracket, 0-90° Tilt Angle, up to 400W/55.51″ Width
Wilson Electronics Pole Mount for weBoost Outside Home Antenna – 901117 – 10″ length
Skywalker 12” Heavy-Duty Wall Mount Pair for TV Antenna Mast with (2) Brackets with Lag Bolts
Discussing Top Weather Station Mounting IdeasSo the first big decision has been made, You purchased a personal weather station. Now you need to choose from various top weather station mounting ideas.
The top choices for weather station mounting are as follows.
Here is a collection of the types of weather station mounting ideas from proud weather station owners. In observing these photos you will notice the many different types of locations where people locate their weather stations.

When you examine these ideas, you can see that you need to think about how to find and install your remote sensors.
You may search for a weather station pole mounting kit to use in your mounting.
If you do this well, you will have many years of climate information being collected properly and accurately.
You will win if you pick the proper type of mount. As I said earlier the proper mounting will make your climate information gathering a
joyful delight for you.
Weather station pole mounting kits come as prepacked, selected, ideal mounting kits. A great example of this would be a best-seller weather station mounting pole kit from Amazon.
One of the best-sellers by my viewers is the Ambient water station mounting kit. This kit when examined will trigger Ambient weather station mounting ideas.
Ambient Weather EZ-29-24 Chimney Mounting Kit with MastBuy Now
Ambient Weather WeatherMount Weather Station MountBuy Now
Ambient Weather EZ2-35W2MC Weather Station Pole Mounting KitBuy Now
As you can see when taking a serious look at these kits, you can mount them on rooftops, on the sides of the roof of the house, or mount them on a pole posted in your yard at ground level.

You will not have to pick out individual pieces to use when mounting your weather station. It will have already been done for you.
You will be extracting the best experience from the equipment you have purchased.
So in looking at the mounting ideas, if you decide on the pole mounts you will need to key in on a couple of very important points.
Find out how big the attachment area on your weather station is. If it will fit up to let’s say for example a description on a weather station may read as such, “The sensor array mounts to any pole between 1 and 2″ diameter. The adaptive mounting bracket and U-Bolt design can be tightened to your mounting pole (not included).”
So as you can see the stations don’t usually come with a mount set up, a pole, or any mount tripod, or whatever, and however, you decide to fasten the equipment to its chosen location.
You can take a look at some of the best offered on the market to use for the mounting process.
Ambient Weather EZ-29-24 Chimney Mounting Kit with Mast
If you choose to mount on your chimney We recommend this chimney weather station mounting pole kit to use to mount from Ambient Weather.
A note to the buyer, please be aware that the anemometer pictured does not come with the mount assembly kit.
It supplies you with a 1 1/4” inch pole for mounting the sensor unit onto. It is available in 35” sections.
So your mount can be 35 or approximately 70” or approximately 105 “ as a height, depending on what height you need.
The Ambient Weather EZ-29-24 Chimney Mounting Kit
It is constructed of rust-proof 10-steel tubing, galvanized using the Flo-Coat (zinc-chromate polymer) for excellent corrosion-proof protection. It also provides straps for mounting around the chimney.
Ambient Weather EZ-48 Weather Station Tripod and Mast Assembly
The Ambient Weather EZ-48 Weather Station Tripod and Mast Assembly
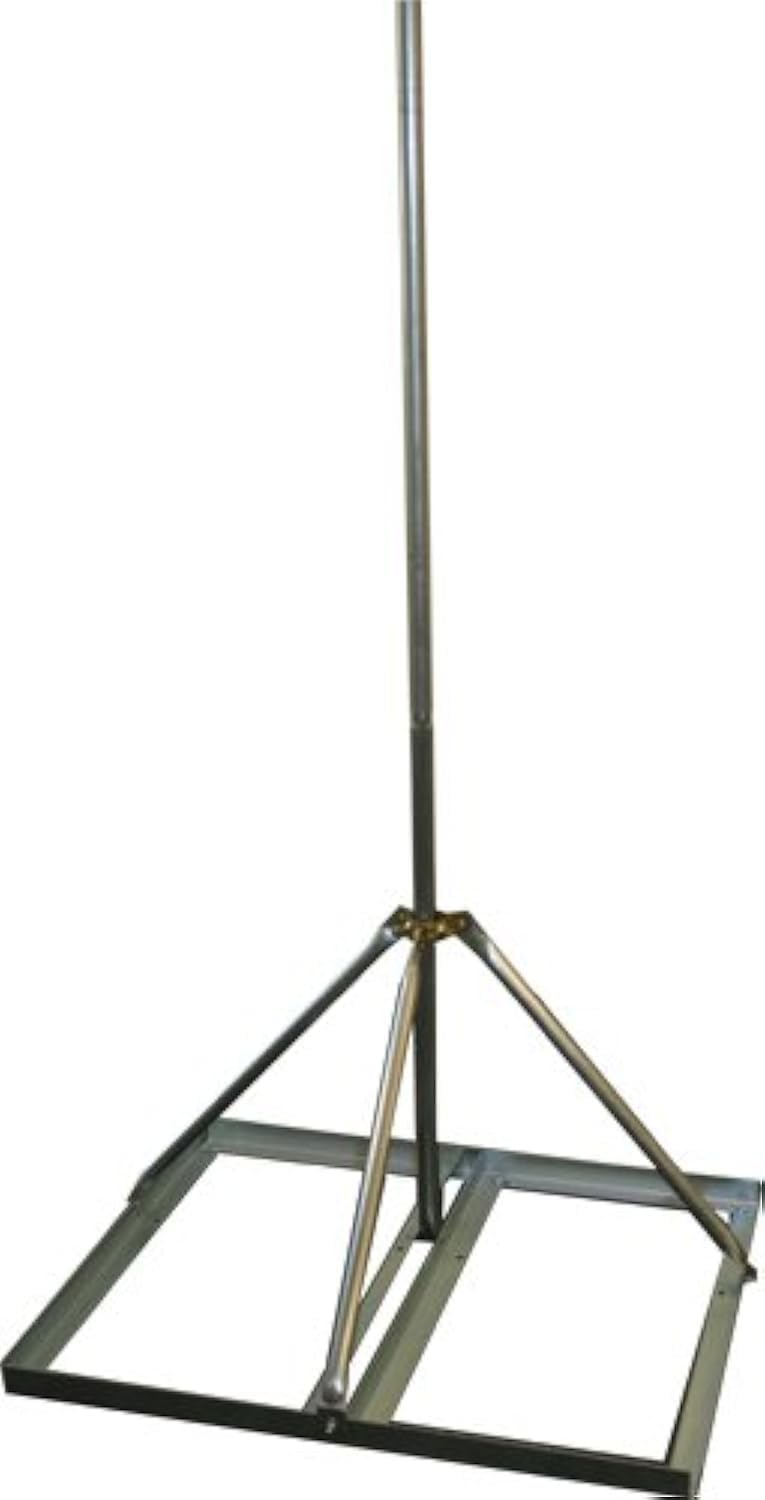
Provides a 1 1/4inch pole to mount on. It is a Tripod mount that can be used on a flat roof, or an area of the yard or a field, etc.
It is also available with a 1-inch pole for mounting.
This assembly is constructed of 18 gauge 1008-10 steel tubing, galvanized using the Flo-Coat (zinc-chromate-polymer) process for excellent corrosion protection
The tripod base is 33-Inch (85.8 cm)
Installed Tripod Height: It is supplied with one mast for an assembly height of 53″-Inch (150.8 cm). Add 35″ mast extensions to increase the height 31-Inch per extension
Accessories that will go along with the Tripod Mount I have suggested to you. These will tie down or secure the tripod mount on either a ground location or a rooftop installation.
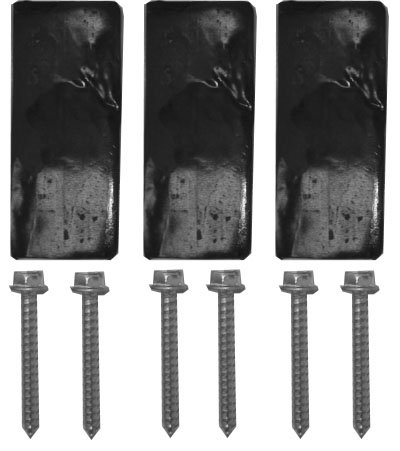
These are two accessories that may need to be added to your Ambient Tripod purchase. One is a set of three stakes to fasten the tripod into the ground at the location of your setup for the weather station.
The second accessory item is a set of three, pads that are designed for you to fasten down on your roof the ambient tripod mount you are buying.
&
Ambient Weather EZ-245-SK 24
Ambient Weather EZ-46-3 Tar Pad Kit for Roof Tripod Installation
To understand these ideas, you must carefully plan how to find and install your remote sensors.
If you do this well, you will collect climate information properly and accurately for many years.
You will win if you pick the proper type of pole mount. You can take a look at some of the best offered on the market to use for the mounting process.
Make sure to secure your equipment properly. It should be able to withstand heavy rain, strong wind gusts, extreme heat, and possibly heavy snowfalls.
Imagine the harshest weather conditions you might face. Take steps to protect your weather equipment from loss or damage.
So location means everything to successfully collect your weather data
So in contemplating your decision, you have decided where the station will be able to sensor the best daily climate results for your liking. Now it’s time to decide how to fasten it down and set it up.
After you have purchased your weather station many different weather station mounting ideas come to
mind. Mounting your personally picked weather station is what you have been looking forward to doing.
You researched and purchased your choice of stations with the end game being that you have plans for what it will deliver for you.
Maximizing the instruments you now have access to will require setting them up properly. As you research this whole process you realize that buying the correct equipment is only a small part of the whole picture.
It is necessary to correctly mount your station in a location that will maximize the readings from these weather instruments.
With this in mind, you will now need to zero in on what manufacturer and make/model you have purchased. This will matter because of the remote sensor package that you now have.
A larger more sophisticated remote sensor unit could be as large as a couple of feet of instruments, however, most remote units are around 15-18 inches in length. This will make a sizable pack that needs to be secured in a good location.
How do you figure out where to set this up, check out our What’s Involved in Weather Station Mounting post. We have many great points to think about and act on. That will help you out with this.
So if you own an AcuRite weather station then you will be dealing with an AcuRite weather station mounting. You will need to find out from their manual what their specifications are and how they suggest you set up the sensor pack.
With the AcuRite 01036 Pro Weather Station 5-in-1 sensor the mounting instructions give you the following information “The included mounting bracket is designed to screw directly onto wooden posts or surfaces that are 2”x 4” or larger. The sensor can also be mounted directly to 3/4” steel pipe (available at hardware stores”
So as you can see companies will give you specific directions on a few measurements that you must match up when installing the sensor on an AcuRite pole mounting.
AcuRite does not seem to sell specific mounting poles, to be used with Acurite weather stations.
However, there are mounting pole kits that you may choose from for your mounting project.
I mentioned them in the earlier segment called Using a Top Weather Station Mounting Idea. Please go there to read about some of your options for mounting.
There are Davis Instrument mounting kits or Ambient mounting kits that are popular and you could buy to use with the AcuRite.
As you will notice, they can be used by any manufacturer’s product if the diameter of the coupling area matches up with the PVC piping or piping that is being used to hold the sensors in place.
The sensors come with a mounting coupler which will need to be attached to your roof your pole the top of your fence, etc, etc.
Here is what it looks like for the AcuRite Pro 5-in-1 sensor.
The most important thing is to ensure that the elements do not impact the location of your weather station.
Secure it firmly with a strong mounting pole. Make sure all your connections are tightened well. [toc]
Some parts are made of plastic. Please do not over-tighten anything, as it may break or strip something.
For optimal usage and performance, place your weather station in a suitable location and secure it.
Ensure that it is elevated above the ground to obtain precise wind and temperature readings.
Again these are discussed in our What’s Involved in Weather Station Mounting post. We hope this information has guided you, we are very glad to help you out with your setup.
What’s Involved in Weather Station Mounting
Using a Weather Station Mounting PoleLet's take a closer look at weather station mounting pieces. As I have worked on content for you the reader, I have found that there are several moving pieces when it comes to mounting a weather station.
What do I mean by weather station mounting pieces? Simply stated you have now purchased a personal weather station and you need to mount it somewhere on your property.

Weather Station Mounting Pieces
Let's take a detailed look at how you got here. Your arrival wasn't accidental, but it happened because you have completed the following steps.
So you are here now. It is time to figure out how you will mount your weather station.
Do you know, what weather station mounting pieces are needed to accomplish a successful mounting in your yard?
The first thing I have discovered on this journey is that trying to buy anything to use to mount a weather station is very difficult in my area.
I am going to go into detail to show you what I have experienced.
Finding the weather station mounting pieces in my location has not worked for me.
What I mean is I could not buy them locally near my home.
My success has been shopping on Amazon.
Follow me as I walk you through three local store walk-throughs.
I shopped at this location 11 miles from where I live. After walking the store, aisle after aisle, what I found is that they didn't carry any hardware that I could use to mount a television antenna to a location, whether it be a roof and side mount on an eave or whatever.
No section in the store had anything to offer me for mounting a weather station.
In fact, upon asking an employee I kind of received a half-baked answer.
Boiled down to "no clue" Why Are You Asking Me This, Is This a Thing Today, In 2022?"
No one installs a TV antenna anymore? Do they? So I was shown where a galvanized pipe was located.
This happened, I am sure because I said you know maybe a galvanized pipe and a bracket to fasten to a roof, a ground mount stand, whatever. So no luck here.
Only some galvanized pipes to choose from.

Lowe's Weather Station Mounting Pieces

Weather Station Mounting Pieces
So I got into my auto and traveled 5 miles to my closet Home Depot. Another large box store hardware entry. No luck here either.
I got directed this time to the roofing area. I believe the clerk this time actually did a better job listening to me, and even though he was struggling to understand what I wanted, he did think it through and directed me to the roofing area.
So what did I find here, some interesting things for my roof, some ideas, but nothing practical, that had anything to do with, mounting a weather station.

Edit your caption text here

Weather Station Mounting Pole Ideas
I guess after my visits to Lowe's and then Home Depot, I would probably get the same thing from my local Ace Hardware Store.
Well, I found out the bottom line, was yes the same thing.
But there was one large exception. I found the customer service at Ace to be outstanding compared to what I experienced at Lowe's and Home Depot.
How about your experiences? Have you found large box stores lack customer service?
Let me know what your experiences have been?
So yes as I referred earlier same last end result. They didn't have anything, I desired or needed as my weather station mounting pieces.

Farmington Ace Hardware Store
My local Ace Hardware Store, while stocked full of wonderful items, It didn't have what I was looking for.
Leaving me with Amazon being my only source of the pieces I needed for mounting the AcuRite Iris 5-In-1 weather station.
So my local search moved on. Where did I go next?
My local search for mounting pieces for my wireless personal weather station took me to the three stores I have just talked about.
Other choices? I really don't have other choices near me.
So I was kind of stuck with Amazon being my answer.
The star of this show is the AcuRite Iris 5-In-1 weather station. You may go to my review of the AcuRite Iris
or you may be interested in checking out my previous post, Watch As I Unbox The AcuRite Iris 5-In-1 Weather Station
You can see why I am excited about getting this set up. I will be mounting the AcuRite Iris in my son's yard.
Watch my videos from the mounting on my YouTube Channel George Loves Weather.
So quite a bit of research went into finding what would work for mounting the AcuRite Iris 5-In-1 weather station.
I decided to mount it on a tree stump, in an area of a yard. It will require a bracket to be screwed into the tree stump.
Then a pole either threaded into the bracket on set on the bracket holder and tightened so as not to move.
I can see the biggest problem with the mounting process to stabilizing the weather station against any wind. Higher speed winds especially need to be accounted for.
So I settled on these two pieces. I purchased them from Amazon as you can see.
I had looked at these other poles and support pieces before I had decided on the ones that I am going to use when mounting this weather station at my son's home.
[amazon box=”B000SONAJ6″ template=”horizontal”]
[amazon box=”B098NHTF64″ template=”horizontal”]
So I will be using these two main components in the mounting.
I see that one of the pieces the Steel Pole for Solare Street Lights actually wasn't exactly what I thought it was.
The pictures in the description show it appearing perpendicular. That is what I wanted to buy.
Often the descriptions in Amazon are wanting for a more accurate description and more pictures.
Be Aware of this when shopping for weather station mounting pieces.
However once the piece arrived it has a slight angle to it. So some DIY adaptations will be needed at the time of mounting.
If you watch the mounting videos for the AcuRite Iris you will see what I mean.
Anyway we made it work for us. Below are some other suggested pieces that may work for you.
[amazon box=”B09QMMVMF4,B002SAOHH2,B088LK17KV” grid=”3″]