
How To Get the Best From Your Proper Weather Station Mounting
Let’s discuss what you can do to be the best at this. Just what do you need to know and plan out, just what you need to know to get the best location?
I will break this down by instrument and discuss how to get the best readings from this instrument.
I am going to discuss the four main weather data collection and reading instrument readings.
These are the readings that you will need to get the most from your weather watching.
The Temperature Reading
Probably the easiest thing to screw up is the thermometer readings. Where you locate the thermometer will make a significant difference in how accurate your temperature readings really are.
As a meteorologist-of sort, you can look at the temperature as the correct reading made in shade with plenty of ventilation. When deciding your mounting location, place your weather station with the following things in mind.
- Make sure the thermometer sensor isn’t ever in direct sunlight
- See to it that the thermometer gets plenty of open airflows and that it isn’t being blocked by the wind
- Be positively sure that the thermometer is placed at least five feet above the grass line
- If the thermometer is set up on a roof-top, it should be at least 5 feet above the roof’s surface-level surface
- Check to see that the thermometer is at least 50 feet from the nearest paved surface. Pavement and sidewalks have a way of collecting solar energy, which will lead to much higher (inaccurate) readings.
- Please note that you could use a radiation shield to guard against the excessive heat build-up
The Rain Collector (Rain Gauge)
- You want the Rain Gauge to receive rainfall as if it were in the middle of a large field. Imagine if you will, nearby buildings create “shadows”.
- Every building has a shadow, with this in mind, imagine if there’s a building nearby (to the west), and it is raining with a west wind. In such an event, your station’s rain collector is bound to miss a lot of falling rain because of the “shadow” cast by the building.
As a rule of thumb guide, you can use the following suggestions
A. a rain collector should be placed with at least 5 feet horizontal clearance from the nearest obstruction
B. If a nearby obstruction is over 5 feet away, that obstruction should be no more than 10 feet tall
Humidity
Humidity measurements should reflect the humidity of the general atmosphere in your location. Your placement of the humidity sensor should incorporate some of the following in your planning process.
Please note being near plants (who are breathing) and being close to bodies of water will influence your humidity measurements.
With this in mind please, make sure you locate a humidity sensor at least 50 feet away from the nearest tree or body of water.
Wind Speed & Direction
The anemometer should reflect the wind patterns as if the instrument was placed in a large field. This is just like your planning was for the Rain Gauge.
Try to place the anemometer as high as is possible for you. A meteorologic standard (in the outside elements industry) calls for the wind reading to be taken at least 10 meters above the ground.
Since this is over 33 feet in the air, you may want to try your best to find a nice roof to install your anemometer on.
Try to make the anemometer the highest object around. Try to place it 7 feet or more above any surrounding obstructions, this is the best placement possible.
Setting Up the Remote Sensors
 You should perform a site survey. This survey will help you to determine the transmission distance. You need to determine, any obstacles to the transmission’s success. It could be distance, and it could be types of building materials as well, that cause the problems for you.
Another thing you need to look at is whether you’re dealing with wireless or cabled transmissions. Wireless is far easier to install than cabled element stations.
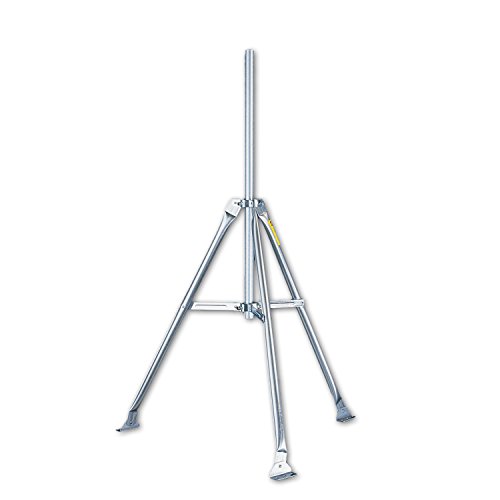
Davis Instruments Mounting Tripod
You may see a variety of areas other weather station owners have set up their climate units by going to our post: Top Weather Station Mounting Ideas.
Please consider an Integrated Sensor Suite where all of the sensors are integrated together in one package. I believe you will find most station units will come with this type of sensor unit.
Also, consider a tripod mounting kit. We have found that most stations include U-Bolt mounting hardware to connect to a mast or pole.
A large faux pas would be to install a wireless climate station in a structure with an aluminum siding or roof. You will find out that metal or aluminum makes a great transmission-blocking agent.
Transmitting through earth or soil, through water, or other physical barriers such as trees may majorly limit your transmission.
Suggestions Before Final Installation
Let’s list some things to test out before you do the final installation of your remote sensor package. Make sure all of your transmissions are working, from where you are planning to mount the unit. Try each and every sensor to ensure all are working properly.
-
- Make sure you are getting a good solid, dependable wind speed reading. Make sure there are no trees or buildings inhibiting a good reading.

- Test out the rain gauge with some real rain. Don’t assume it is going to work properly.
- All temperature readings should be tripled checked for accuracy. Not too low to the ground, and no interference in keeping or preventing excessive heat build-up. If you are using an aspirating fan just make plenty sure it is doing its job.
- For a ground installation, there is a rule of thumb that many manufacturers suggest you go by. It is called the 4 to 1 rule. If your house is 18 ft. tall, then move out 72 feet in a direction to make up for the tallness factor. This will ad to the accuracy of the readings, by cutting down on any interference there may be.
- As an added example I found this excellent example of the 4 to 1 rule on the Davis Instruments mounting instructions. Let’s say for an example, your building is 25 feet tall, and your anemometer is 5 feet off the ground, install the weather station at a distance of 80 feet, or: Distance = 4 x (Obstruction Height – Anemometer Installed Height)
Distance = 4 x (25′ – 5′) = 80′. I hope this will suffice in helping you to understand this rather smart way of ensuring better sensor readings.
Lightning
MFJ-270 Lightning arrester DC-1GHz, UHF-F/F 400W by MFJSome areas are more prone to direct or indirect lightning strikes. Often these will damage your personal station.

This can happen even if you have a type of lightning arrester (like the MFJ-270 Lightning arrester) installed on your station.
You may even want to invest the money into paying an electrician to set up a lightning rod protection system on your weather station.
This could probably be done inexpensively and would be worth your investment.
Just realizing this may happen, can help you in being better prepared.
Wireless systems need protection, but cabled weather stations can result in even more damage, as in your home is damaged significantly if the path of least resistance in a lightning strike is into your house, and through your weather station’s display console.
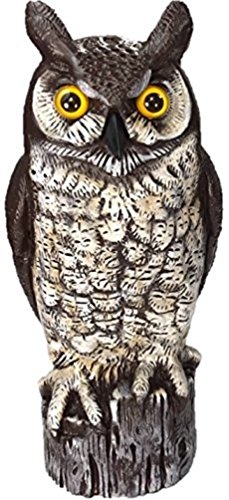
Birds and Rodents
For wired installations, it is recommended you run the cables in an electrical conduit, to protect against rodents chewing into your wiring. They can cause major problems with your system by doing this.
Birds will excrement and nest in your rain gauge. It is a great idea to mount your rain gauge in an open area.
You may need to install a decoy owl. Many people have said the owl decoys do the work of totally scaring any bird activity in your weather sensor suite.
Another idea would be you could use a spike strip around the rain gauge area, this too can be very effective for you in keeping this irritating thing from happening to you.
An ounce of prevention is always worth a pound of cure as the saying goes.
&
Dalen OW6 Gardeneer Scarecrow Great Horned OwlCat and Bird Repellent Spikes 20pk [20ft]
![Cat and Bird Repellent Spikes 20pk [20ft]](https://images-na.ssl-images-amazon.com/images/I/61Y7keMTn-L.jpg)
One last thing to be aware of, wind direction must be calibrated to true North. A compass or GPS is required to calibrate the wind direction.
You may consider a digital compass or GPS for even greater improved accuracy.
Weather Station Mounting In Summation
As you expand your hobby, hopes, and dreams into reality, be aware of how wonderful owning your own weather station can be.
The daily climate forecasts, the data transmissions that help you establish a solid history of collected instrument data, and how much fun using this station will be for you.
Because you set up the unit in the best possible way, you will maximize the pleasure from it as well as get the greatest results possible.
Planning and setting up according to your initial plan will make your weather experience even better than what you ever imagined.

Weather Enthusiast’s Journey
From an early age, I discovered the profound impact weather has on our lives.
A stormy day can disrupt your plans, while perfect weather feels like a precious gift meant to be savored to its fullest.
Through this site, I’m passionate about sharing my expertise on weather instruments and their practical applications for enhancing your daily life.
I’ll show you how a personal weather station can transform your home experience, giving you valuable insights about conditions on your specific property.
Explore my discoveries and gain the knowledge to truly understand the weather patterns in your area.
Welcome to a community where weather isn’t just small talk—it’s a fascinating science that connects us all.

Leave a Reply